
Providing seamless, cross-channel support is essential for delivering a modern customer experience.
If you’re using Voiso’s CCaaS platform, enabling the Omnichannel Workspace allows your contact center to handle digital interactions across Facebook Messenger, Instagram, WhatsApp, and more.
But there’s a catch: to use Messenger and Instagram, you need to complete Facebook Business Verification first.
This guide will walk you through everything you need to know to configure your omnichannel environment in Voiso and get your business verified by Facebook.
Key Takeaways
- Omnichannel Workspace Overview: Voiso supports voice, SMS, webchat, WhatsApp, Telegram, Viber, Facebook Messenger, and Instagram to provide seamless cross-channel support.
- Enabling Omnichannel in Voiso:
- Add channels via Administration > Digital Channels.
- Configure user roles and permissions through Basic Roles or Security Access Groups.
- Assign channels, capacity limits, and teams to agents.
- Create queues and design message flows using Flow Builder.
- Set timers for first response, reply, resolution, and inactivity to maintain SLAs.
- Use message templates for consistent, efficient communication.
- Facebook Business Verification Importance: Required to enable Messenger and Instagram integration, increase WhatsApp Business API limits, and build trust with customers.
- Verification Requirements:
- Business legitimacy – official registration, tax ID, matching Business Manager name.
- Domain verification – via DNS or HTML file upload.
- Website & online presence – functional site, Google/LinkedIn presence.
- Professional contact info – email, address, phone number.
- Meta activity – active Facebook Pages, Instagram Business Profiles, and ads improve credibility.
- Completing Facebook Verification: Log into Business Manager → Security Center → Start Verification → provide legal info, upload documents, verify domain → confirm via email/phone → await review (1–3 days).
- Integrating Verified Facebook Channels in Voiso: Add Messenger/Instagram channels, assign to agents and queues, and update flows to include new sources.
- Benefits: Enables a connected, efficient, and customer-focused contact center with agents capable of handling multiple digital channels seamlessly.
- FAQs & Considerations:
- Messenger requires business verification.
- Domain changes require re-verification.
- Agents can manage multiple channels with proper assignment and capacity configuration.
Step 1: Understanding Voiso’s Supported Digital Channels
Voiso’s Omnichannel Workspace supports the following digital and voice channels:
- Voice
- SMS
- Webchat
- Telegram
- Viber
- Facebook Messenger
Your plan determines which channels are available. For example, Messenger and Instagram are available to Pro and Custom users. Be sure to confirm your plan’s eligibility before proceeding.
Step 2: Enabling Omnichannel Capabilities in Voiso
Start by contacting your Voiso account manager to enable omnichannel functionality. Once it’s activated, follow these steps:
A. Add Your Channels
Go to Administration > Digital Channels > Add Channel. Choose from Facebook, Instagram, WhatsApp, Webchat, etc. Make sure you’ve set up accounts with the relevant providers beforehand.
B. Configure Users and Roles
There are two ways to assign agents:
- Basic Roles: Enable the Omnichannel Workspace Enabled permission on the user profile or via CSV import.
- Security Access Groups: Create a group with omnichannel permissions and assign agents accordingly.
C. Assign Channels and Capacity
For each agent:
- Assign specific channels they can handle.
- Set capacity limits (e.g., how many chats they can manage at once).
- Assign them to appropriate teams.
D. Set Up Queues
Create queues that include digital channels. Go to Inbound > Queues, and under Connected Channels, select the digital platforms you want. Assign agents and set channel priorities.
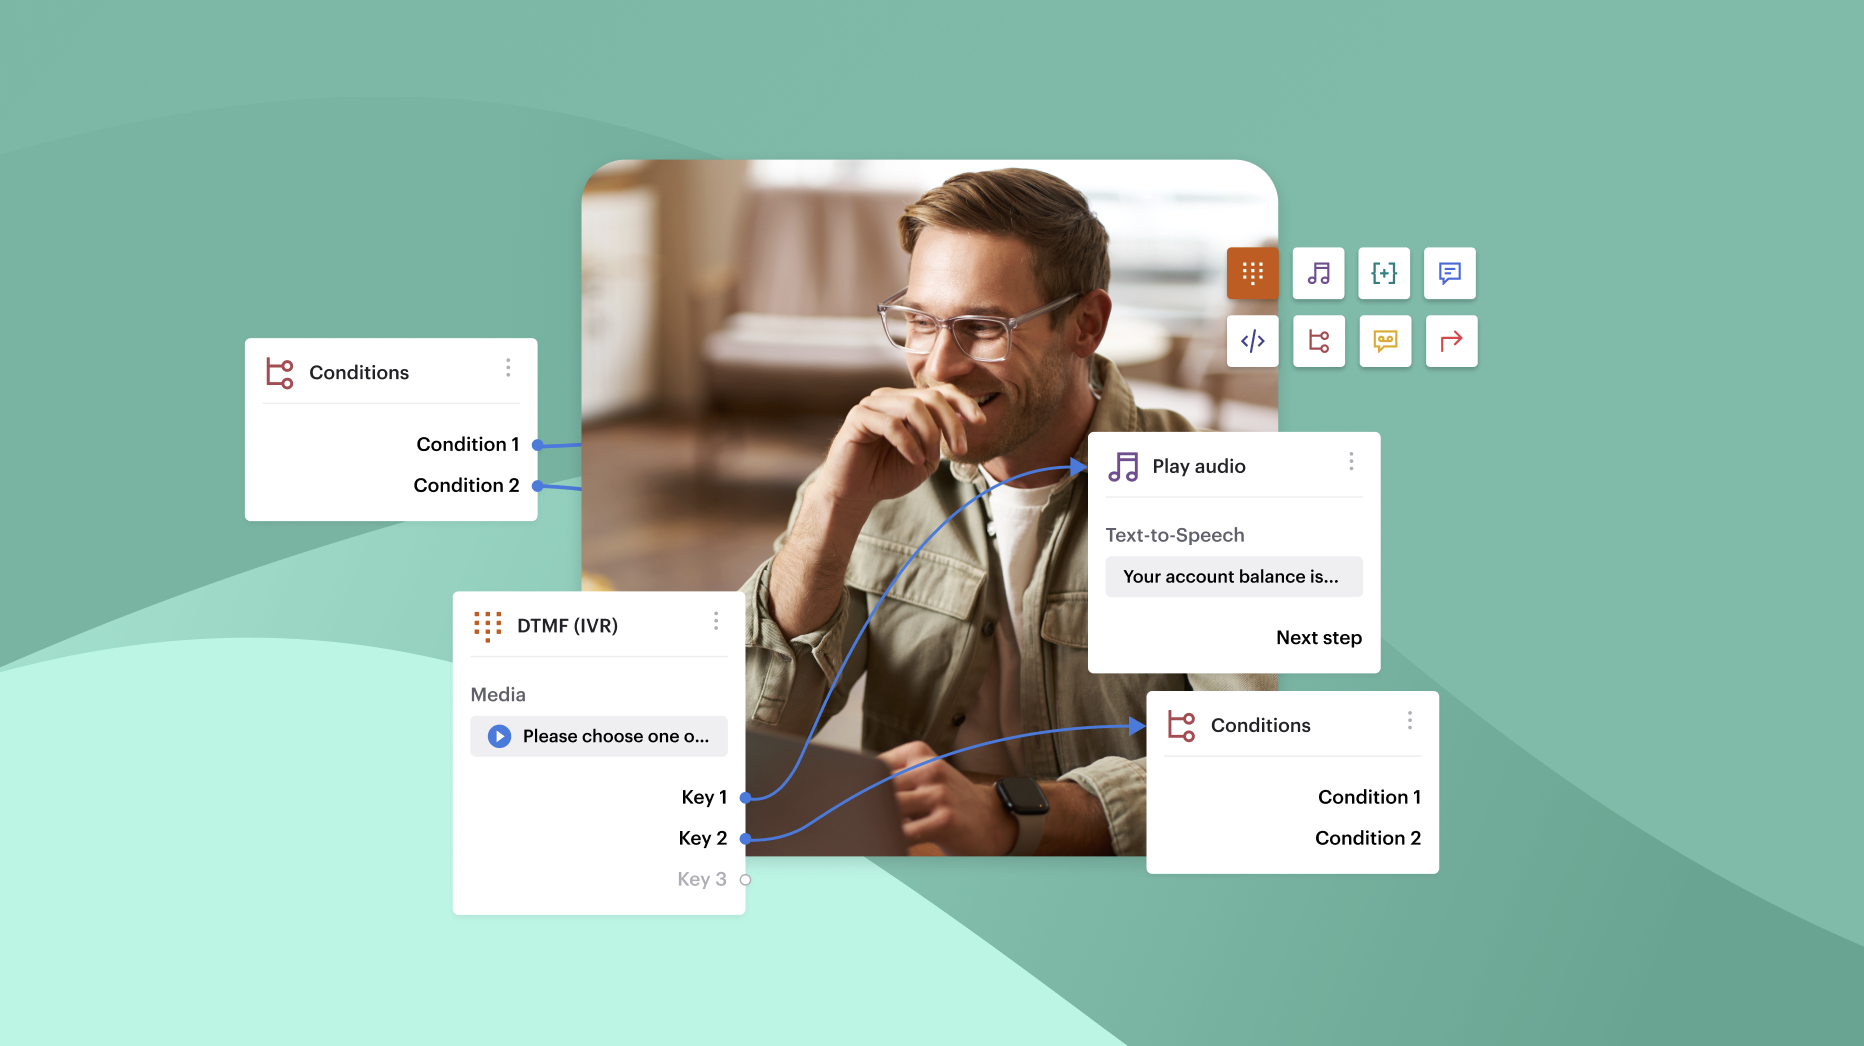
E. Design Flows
Use Voiso’s Flow Builder to route incoming messages to the right queues and agents. This ensures every interaction is handled efficiently.
F. Set Timers
From Administration > System Settings > Timers, define:
- Time to first response
- Time to reply
- Time to resolution
- Inactivity auto-archive timeout
These timers help maintain SLA compliance and boost agent accountability.
G. Create Message Templates
Predefined responses save time and ensure consistency. Go to Administration > Message Templates to create channel-specific replies.
Why Facebook Business Verification Matters
You cannot use Facebook Messenger or Instagram in Voiso until your business is verified by Facebook. Verification unlocks:
- Messenger and Instagram integration
- Higher messaging limits on WhatsApp Business API
- Greater trust and transparency
Step 3: Facebook Business Verification Requirements
To qualify for verification, your business must meet these criteria:
A. Business Legitimacy
- Register your business officially (license, tax ID, utility bill)
- Business name must match your Facebook Business Manager name
B. Domain Verification
- Verify your domain via DNS or HTML file upload within Facebook Business Manager
C. Website & Online Presence
- A functional website that reflects your business name
- Presence on platforms like Google and LinkedIn helps
D. Business Contact Info
- Use a professional email (e.g., [email protected])
- Your website must clearly display a business address and phone number
E. Meta Activity
- Running Facebook/Instagram Ads improves credibility
- Maintain active Facebook Pages and Instagram Business Profiles
Step 4: How to Complete Facebook Business Verification
Follow these steps to get verified:
- Log into Facebook Business Manager
- Go to Business Settings > Security Center
- Click Start Verification
- Enter legal name, website, and contact info
- Upload documents proving business legitimacy
- Verify your domain
- Choose your preferred contact method (email/phone)
- Enter the confirmation code
- Await Facebook’s review (usually 1–3 days)
If rejected, review your documents, improve your online presence, and reapply.
Step 5: Integrating Facebook Channels in Voiso
Once verified:
- Return to Administration > Digital Channels > Add Channel
- Add Facebook Messenger and/or Instagram
- Assign these channels to agents and queues
- Update your flows to include these new sources
Final Thoughts
By completing Facebook Business Verification and enabling Voiso’s Omnichannel Workspace, you’re setting the stage for a more connected, efficient, and customer-focused contact center.
Whether you’re responding via Messenger, WhatsApp, or Webchat, omnichannel tools ensure your agents meet customers where they are – without missing a beat.
FAQs
Can I use Messenger without Facebook Business Verification?
No, Messenger integration requires a verified business account.
What if I change my website domain?
You must re-verify your new domain in Facebook Business Manager.
Can a single agent handle multiple channels?
Yes, just assign the channels and adjust their interaction capacity accordingly.